- Gift ideasNew!
- Photo PrintsNew!
- Photo Magnets
- Photo Books
- Wall ArtNew!
- Calendars
- Accessories
- Occasions
- Magazine

If you think mini photos are only good for your wallet or small photo album, you are wrong. We're going to show you six different ways you can use our mini photos creatively this Christmas. Use mini photos for unique gift wrapping or Christmas decor. Or use mini photos for a gift that won’t break the bank.
Giving Christmas presents is not always easy. Who has the time to think of new and unique gifts for their loved ones every year? Don't resort to the same old gifts and give the gift of shared memories and photos instead.
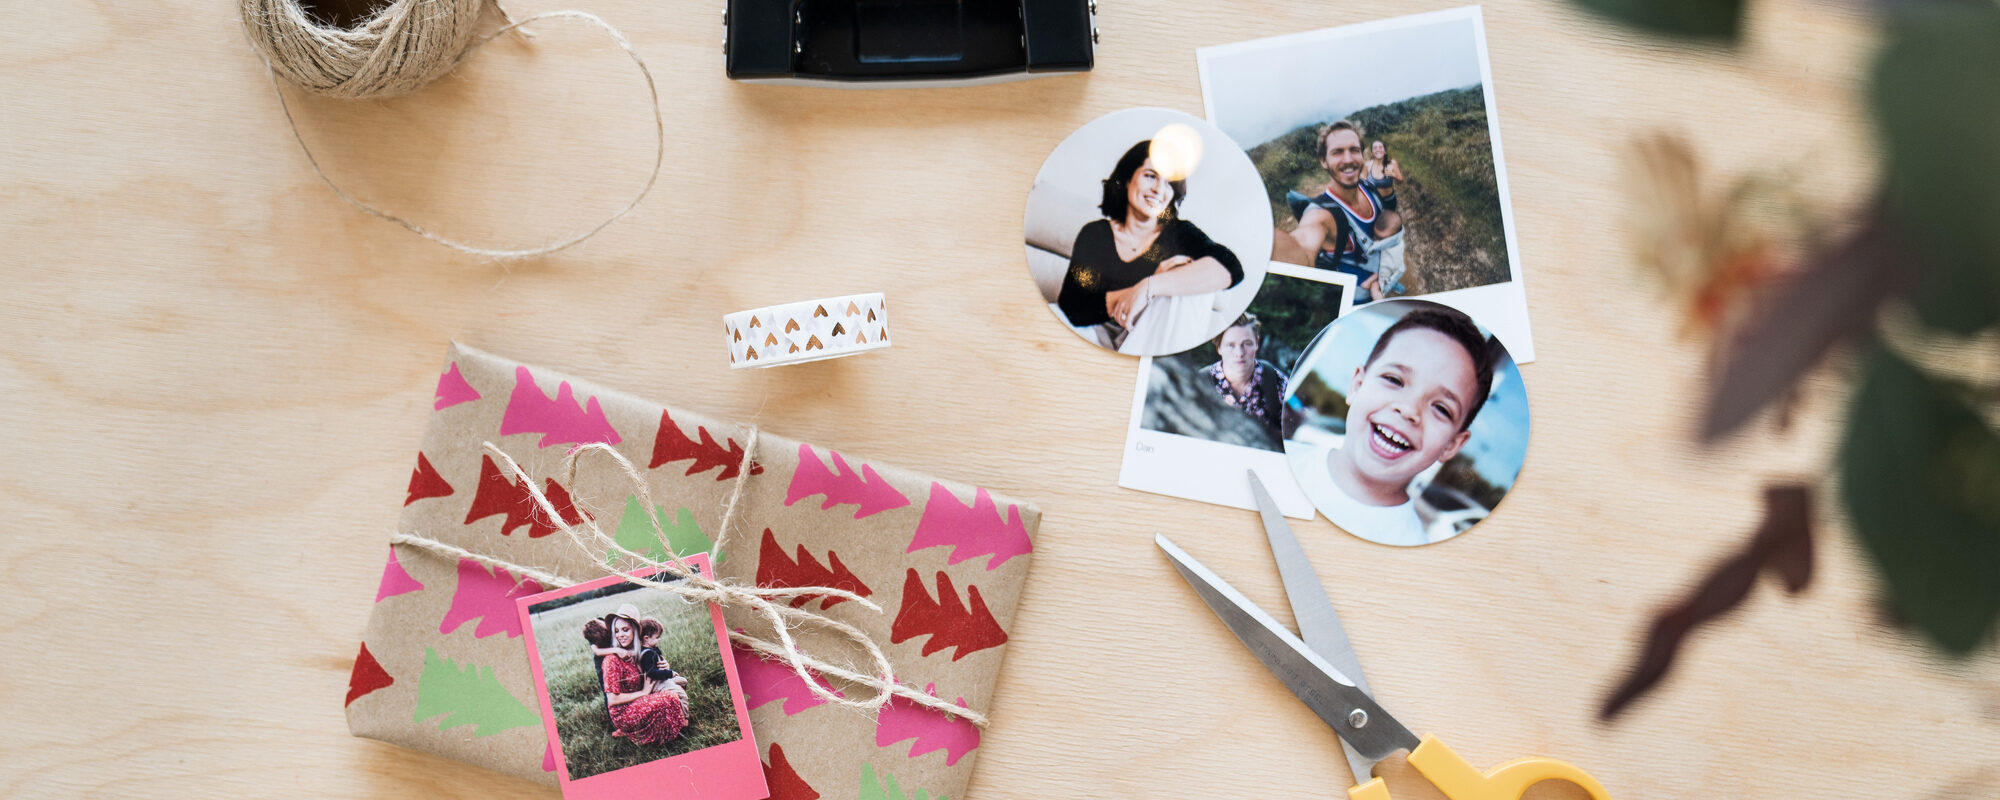
Whichever gift you choose, mini photos are a great substitute for traditional gift tags. Simply print your loved ones' favorite photos, punch a hole, thread a string, and attach them to each gift. Not only will your gifts be the most unique ones under the tree, but if you have little ones at home who can't read yet, they'll know exactly who the gifts are for.
💡Tip: If you don't feel like putting gift tags on a string, try photo stickers and simply stick the gift tags to the wrapping paper.


A beautiful way to give gifts from the heart is an accordion book, especially if you make it all by yourself. You can create one for your grandmother or mother to display photos at home. They will definitely appreciate the DIY aspect.
💡 Tip: Try making the cardboard bigger and glue several photos in different formats on each page.


We all know photo collages on the wall, but have you tried creating a collage in the shape of a Christmas tree? Instead of a square or a heart, the photos are arranged differently and you instantly have a beautiful Christmas decoration. Depending on how big you want to make your tree, print your photos. For example, we made a tree using 40 photos, including one photo of a Christmas star that we put on top. 🎄
You can also add lights to the collage, or add a real tree-topper on top. ⭐️
💡 Tip: If you don't want to get a Christmas tree this year, a tree-shaped collage is a perfect substitute that doesn't take up any space and you won't have to vacuum pine needles all winter long.


Create a mini photo album that fits your mini photos perfectly. It will make a lovely little Christmas gift, and it's very simple to make. Print the mini photos in one format. For example, we chose a rectangle landscape format. Cut the papers according to the number of mini photos (plus one for the title page). Measure the single sheets and make them a little larger than the mini photo and leave more space on the left side for the holes. Line up all the sheets on top of each other and punch the holes side by side. Thread the string through the holes to join all the sheets together. Then, just glue the photos on and decorate the cover page.


You can also use mini photos to create beautiful Christmas tree ornaments. Simply print out photos in the shape of a circle, heart, or any shape you like, punch a hole through them, pull a ribbon through, and hang them on the tree. We recommend gluing two photos together to make a sturdier, double-sided ornament.
Print out a few ornaments each year and gradually add all your important memories to your tree.

A photo frame with one photo is beautiful, but what if you can't pick one single photo to have on display? Simply choose several photos and create a collage in a photo frame.
Arrange your photos on the paper in different shapes. For example, try a heart or one of the shapes you see in the pictures below. When you're happy with the result, stick the photos on the paper, insert the whole thing into the frame and you're done. The recipient can then hang the picture anywhere in their home and will remember you fondly whenever they walk by.
💡 TIP: Don't feel like making a collage? Simply create one in our editor. We will print it for you as a poster.



Due to new U.S. customs rules, we’ve had to introduce a $100 minimum order for American customers. Small pa...

Colorful leaves, shiny chestnuts, pumpkins on every corner… Autumn is truly magical. It’s also the perfect ...
Iceland is a country that gets under your skin. A landscape full of contrasts, where glaciers meet fire and...

During the summer, we take a lot of photos and it happens that the best moments remain buried deep in the g...

Love the look of Instax photo prints with their iconic frame but don’t want to invest into an expensive cam...

Want to turn your photos into black and white photo prints and create classic and elegant photographs for y...

Não espere. Use o código XMAS10 para 10% de desconto em presentes de última hora.